Category: North America

  • Visit Seattle in 2025: cost overview and helpful ideas

    Visit Seattle in 2025: cost overview and helpful ideas

    Seattle is a wonderful city, but you might be worried about your budget. I got your back! The cost of travel in Seattle can be easily cut down if you follow simple guidelines and well, my tips! Before jumping into them, let’s take a little step back.

    When you begin to explore the United States, you should ask yourself a simple question:

    Where should I start spending my money?

    You’re going to roam around the US after all. Well, what I did was choose to visit the cities on the West Coast. This area is notoriously expensive compared to many others in the country, and Seattle is no exception.

    Wait!

    I’m not saying you cannot afford a trip to the West (I’m sorry if I scared you). With accurate planning, everything is possible! Seattle offers cheap accommodation alternatives like hostels. In addition, you won’t need a car to move around the city: you can easily walk between attractions. And when you have to reach the Space Needle or Capitol Hill, the excellent public transport system will take you there.

    The vibrant Public Market brings great food at affordable prices and a feeling that Seattle is actually worth the ride. Not enough, Seattle’s multiple viewpoints and incredible music scene will let you realize that all the pre-trip overthinking was useless.

    Sunset from Pike Place Market in Seattle. What else?
    Sunset from Pike Place Market. What else?

    Although some tickets are a bit expensive – in my opinion – you can always choose the attractions of your preference. Whether you have limited time or you’d like to keep an extra eye on the budget, Seattle’s culture and history will overwhelm you (in a good way!).

    It’s time to get into detail about everything that you are interested in to plan your trip to Seattle. Again, it’s not the cheapest place in the world, but this doesn’t mean you have to give up! And if you’d like to go after reading this analysis, don’t forget to check out the best things to do!

    Enough random talk – let’s dive into the cost of travel to Seattle!

    Disclaimer: I have considered low and mid-budget plans. I don’t usually look for luxury travel.

    Planning your trip

      The cost of accommodation in Seattle

      The cost of accomodation in Seattle has budget-friendly alternatives. At the same time, you’ll have to reconsider your money plan if you like privacy and good positioning coming in the same package.

      The cheapest hostel: American Hotel Hostel (50 USD a night plus tax for a four-bed dorm)

      American Hotel Hostel is located in the Chinatown district, close to Union Station. This was my choice while visiting Seattle. Here you can find both travellers and (many) locals. It has all amenities, including a kitchen, laundry room, and shared spaces. However, the dorms don’t give you literally any privacy because the room card keys can open every door. I didn’t feel unsafe, but I chose to be careful with my belongings anyway. To be honest, I also didn’t feel a super friendly atmosphere there. Overall, I’d say that if you can spend just a bit more money, you should go for the next budget option.

      The best hostel: Green Tortoise Hostel (55 USD a night plus tax for a four/six-bed dorm)

      Looking for something in a central location, having comfy rooms and nice people to meet? This is Green Tortoise Hostel, which you can find right next to Pike Place Market. When I was in Seattle, a friend of mine was staying there. He told me that the dorms were cozy and a good breakfast was included in the price. Despite being close to the market, the hostel was also very quiet. If I were you, I would book a room at Green Tortoise – you should plan in advance because this place gets busy quickly.

      The Green Tortoise Hostel  stands out in front of the modern Seattle.
      The Green Tortoise Hostel stands out in front of the modern Seattle.

      Airbnb: 120-160 USD a night for a central location

      Airbnb has always been my friend (especially in Europe!), but the cost of private spaces in Seattle becomes a mid-range choice. There are just a few rooms located in the core districts. The reason is that offices populate downtown. You’ll likely have to take into account the increased public transportation fares to move around. On the other hand, you’ll get the privacy you want, for sure.

      The cost of transportation in Seattle

      The cost of public transportation in Seattle has decent fares (although slightly pricey compared to Europe) and is definitely a good option to move around.

      From the airport to downtown

      First of all, you can take the Link Light Rail train from Seattle Airport heading Northbound to reach downtown. The ticket price is just around 3.00 USD, and it takes approximately 30-40 minutes. I’d highly recommend going down this route because you’ll have to pay 40-60 USD for Uber and Taxi services.

      Roaming around neighbourhoods: how?

      Before getting into more details, you should know that you can explore Seattle on foot fairly easily. This includes Pike Place Market, the business district with museums and music venues, and most of the landmarks.

      This being said, places like the Space Needle and Capitol Hill probably require public transportation. The city offers the ORCA card and paper tickets. The card costs 5.00 USD and it can be reloaded online or through Google/Apple Wallet. This is why it can also be virtual, which makes things easier. Every ride on bus/light rail/metro usually costs 3.00 USD. Luckily, the card tap lasts for 2 hours, which allows you to move around quickly if you’re planning to use public transport extensively. You can also buy a day pass with ORCA for 8.00 USD. This last option is probably good for you only if you’re going to bounce from East to West Seattle in a single day.

      The ORCA card is accepted on the monorail too. However, the ride’s price is 4.00 USD. The monorail is the perfect choice to reach the Space Needle, and I’d say you should take into account these extra fares.

      Tip: I’d recommend purchasing the ORCA card if you’re planning to heavily rely on public transportation. For instance, I’ve only paid a couple of rides to reach the Space Needle and Capitol Hill. And paper tickets can be valid for up to 3 hours if the driver marks them like that!

      Orca cards. Courtesy of ccsww.org

      Feel green? Ride e-bikes!

      There is one last alternative to visit Seattle: e-bikes. If you’re planning a long weekend in the city, renting a bike is extremely convenient – and environment-friendly!

      Lime sharing is a great and cheap option. You can purchase a 3-day ride pass for 12 USD. The voucher is valid for 60 miles, which means you’re going to be fine for the whole trip around the city! Strolling around Seattle on a bike is safe and you can enjoy your time, stop to have a bite, and avoid waiting for buses.

      The cost of food in Seattle

      Seattle is influenced by many food cultures, especially Irish and Asiatic. At the same time, Pike Place Market is full of local fish and other tasty meals, which you can have for very cheap prices.

      Pike Place Market – cheap and incredible

      And it’s the public market where you should have your lunches – and having dinner while staring at the sunset wouldn’t be a bad choice either. You’ll find countless options to save money without giving up on great meals.

      Michou Deli has pretty much everything: delicious meats, fancy salads, different appetizers and desserts. You can have an amazing sandwich for around 10 USD, while the salads are even cheaper! Looking for some street food instead? Los Agaves is perfect for having a taste of Mexican on-the-road meals. Burritos, taco plates and bowls come for around 15 USD. Among the many dining places the market offers, Crepe De France is a valid alternative, both for every kind of breakfast! Yes, because you’ll have sweet or savoury crepes for around 15-18 USD – with fresh and excellent ingredients.

      Outside of Pike Place Market at night. Cool stuff is often going on here, like in all Seattle.
      Outside of Pike Place Market at night. Cool stuff is often going on here

      Dining out

      I love to experience some live music while having a great bite. You don’t have to spend a fortune to find a good place – unless you’re fancier than I am!

      Irish tradition is all over the US, and Kells Irish Restaurant and Pub brings it to Seattle close to the market. You’ll have awesome fish and chips for around 25 USD, and any kind of meat sandwich for around 20 USD. I’d recommend checking out their weekly schedule, which often offers local artists playing during the evenings. Having a couple of beers will bring your total bill up to 40 USD or so – your choice, of course!

      And what about you’d like to spend a night in Capitol Hill? Don’t worry, I got you covered. Ruta is a fantastic Ukrainian restaurant located in the core of the neighbourhood. Here you’ll have amazing traditional dishes (I’d suggest the Chicken Kyiv, it was so good!) for a decent price – around 25-35 USD for a casual dinner. If this is not enough, you should also know that many pop and rock music artists play here at night. Perfect combination!

      Tip: honestly, I believe the best live music you’ll listen to is being played at Dimitrou’s Jazz Alley (listed in the activities below), which requires a financial effort just for the ticket. Therefore, you should plan a cheap dinner that night, and play your cards better for the rest of your trip.

      Speaking about lunch alternatives to the Pike Place Market instead, Mason’s Famous Lobster Rolls showcases tasty opposites: lobster as fast food! If you’re around downtown looking for a different seafood experience, you’ll get a delicious lobster roll for around 25 USD. I mean, it’s the “pinchy red” after all!

      One of the many colourful streets in Capitol Hill

      Cafes and breakfast

      If you happen to be in Capitol Hill, Espresso Vivace is one the best spots you’ll ever be for roasted coffee in Seattle. This shop isn’t just espresso, though. You’ll have many exquisite options for iced tea and hot chocolate. Everything is around 4-6 USD, so enjoy your incredible treats!

      Staying in the same neighbourhood, breakfast has been a specialty of Glo’s Cafe for a long time. You’ll find fantastic eggs Benedict, delicious pancakes, and wonderful omelettes. Prices vary between 15 and 30 USD – so just consider it in your budget planning!

      The Original Starbucks must be a destination for one of your early roams or mid-afternoon snack time. This is the first ever Starbucks opened in North America and is located in front of the public market downtown. FYI this is a good place for souvenirs as well!

      Ludi’s in downtown Seattle is the perfect spot for a cheaper brunch compared to Capitol Hill. This diner has been running for so many years and it’ll help you have an amazing start of the day for around 15 USD – sweet or savoury. I’d recommend trying their pancake specialty for 20 USD though!

      The cost of activities in Seattle

      The city is incredibly packed with activities, which cover almost everything. From museums and live shows to the Public Market, from high towers and breathtaking views to history and cultural identity, the cost of many activities in Seattle is worth to be planned.

      Museums

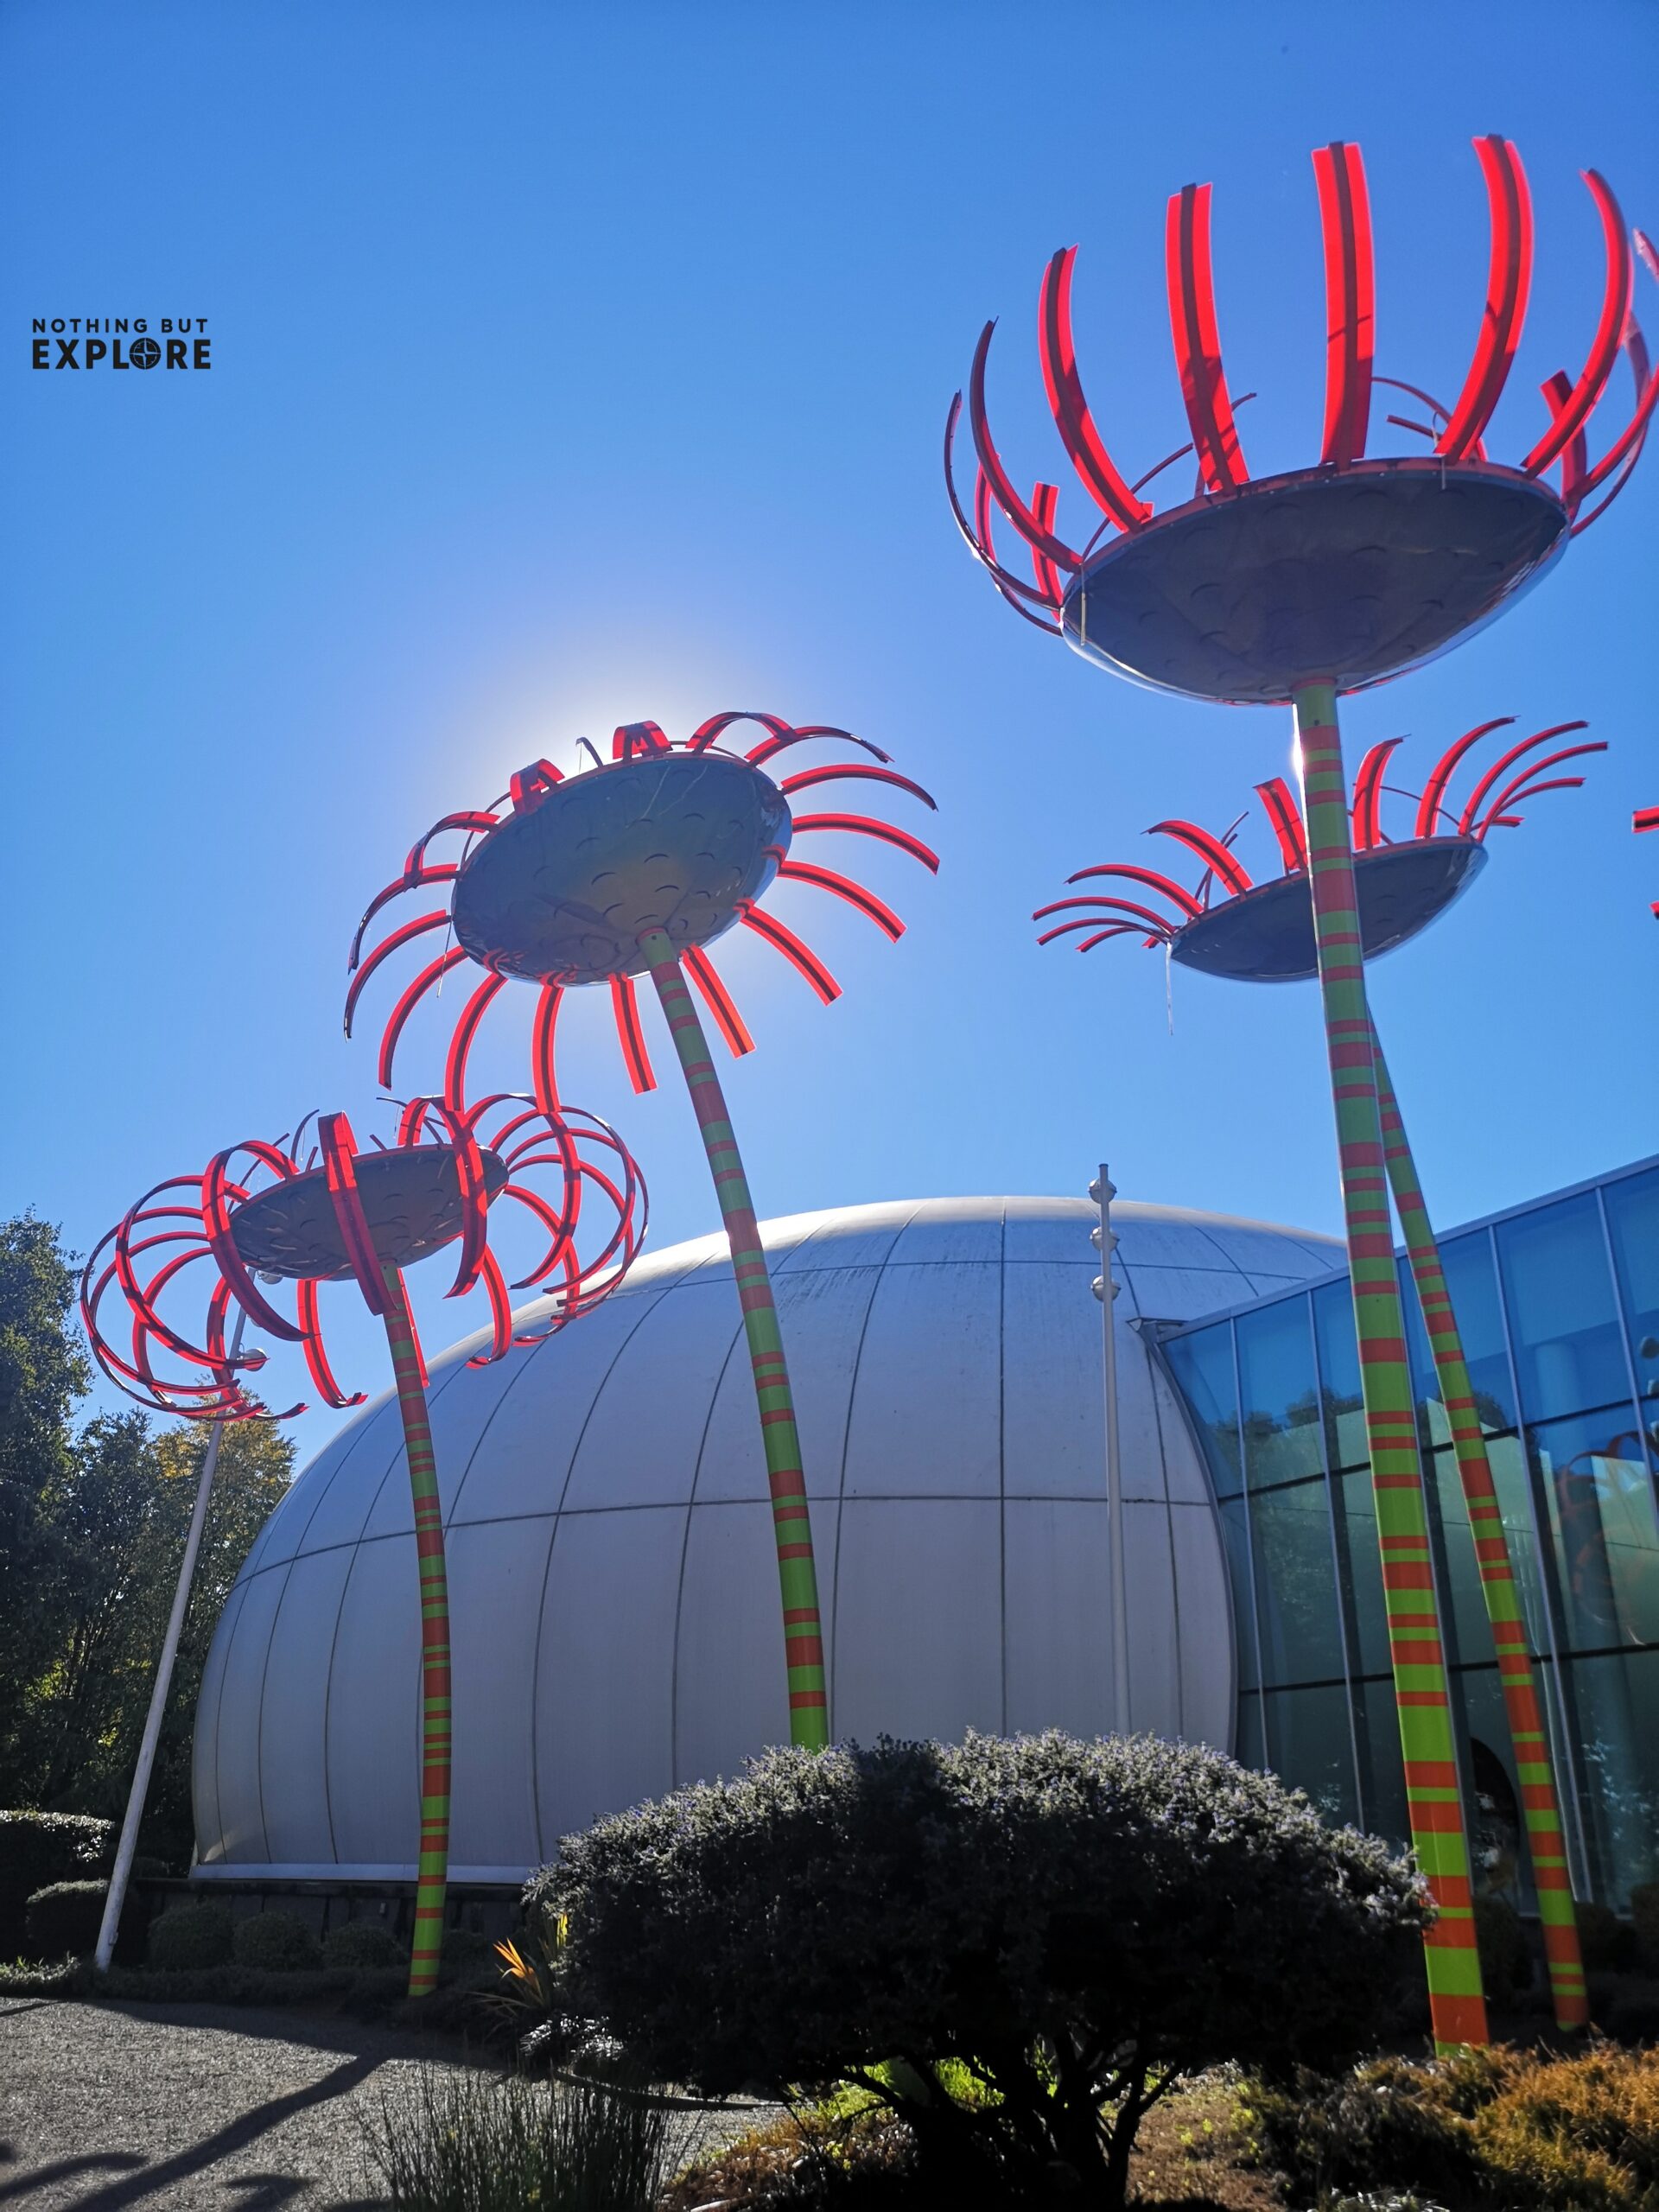
      Honestly, I’m not a big museum guy – and I wasn’t planning to go to any of them there. However, my last day turned out to be extremely fun and interesting thanks to the MoPOP.

      Tickets for the Museum of Pop Culture are around 30 USD and believe me: you’ll be over the moon. You’ll find an outstanding collection of props and costumes from the best movies that made the history of pop culture. Moreover, the entire museum is based on interactions with visitors, making the ride (even more) suitable for children too. Not to mention, there are music rooms where you can play with others! Exciting, isn’t it?

      If you’re looking for something more traditional, the SAM (Seattle Art Museum) should be your choice. Tickets cost 20 USD – book it in advance because the price goes up if you wait until the last minute. The art museum hosts different collections, including beautiful samples of Mesoamerican art and an interesting Porcelain room. Many exhibits vary time by time, so ensure you check the current status.

      The MoPOP from outside. Even its design is amazing

      Music

      One of the places that should be on top of your list is Dimitriou’s Jazz Alley. This intimate location has been hosting exceptional artists throughout its history. With an amazing weekly schedule, this venue is the perfect spot to spend a night when in Seattle. Depending on the artist, the prices may vary – but you can get a great seat for around 60 USD. If you’re good with your budget, you can spend another 20 USD and enjoy a cocktail while listening to the live performance.

      Don’t worry, you have a cheaper option! If you happen to visit Capitol Hill, I’d recommend spending an evening at Neumos. This venue hosts artists from all over the world, who bring different music genres to Seattle. Tickets are usually around 10-20 USD, making this spot very appealing.

      Free activities, yes!

      Surfing the musical wave, there are small alleys in Pioneer Square which sometimes host free live shows. Not enough, there are a ton of pubs and bars where you can have good food and listen to local artists! You can check many events happening in the city on this website.

      Do you love stunning views? Kerry Park is the perfect spot to admire Seattle from above without opening your wallet. You should climb up there after you visit the Space Needle or MoPOP since this viewpoint is located in the next neighbourhood.

      And you have the whole Pike Place Market at your disposal – walking between local merchants will bring you back in time. While there, you can stroll down the waterfront and take beautiful photos, especially at sunset.

      Free expression is the defining term in Capitol Hill instead. Street art all over the walls and colourful buildings are all free of charge. You’ll witness the history and values of this city just by roaming around. So fascinating!

      Towers, towers…

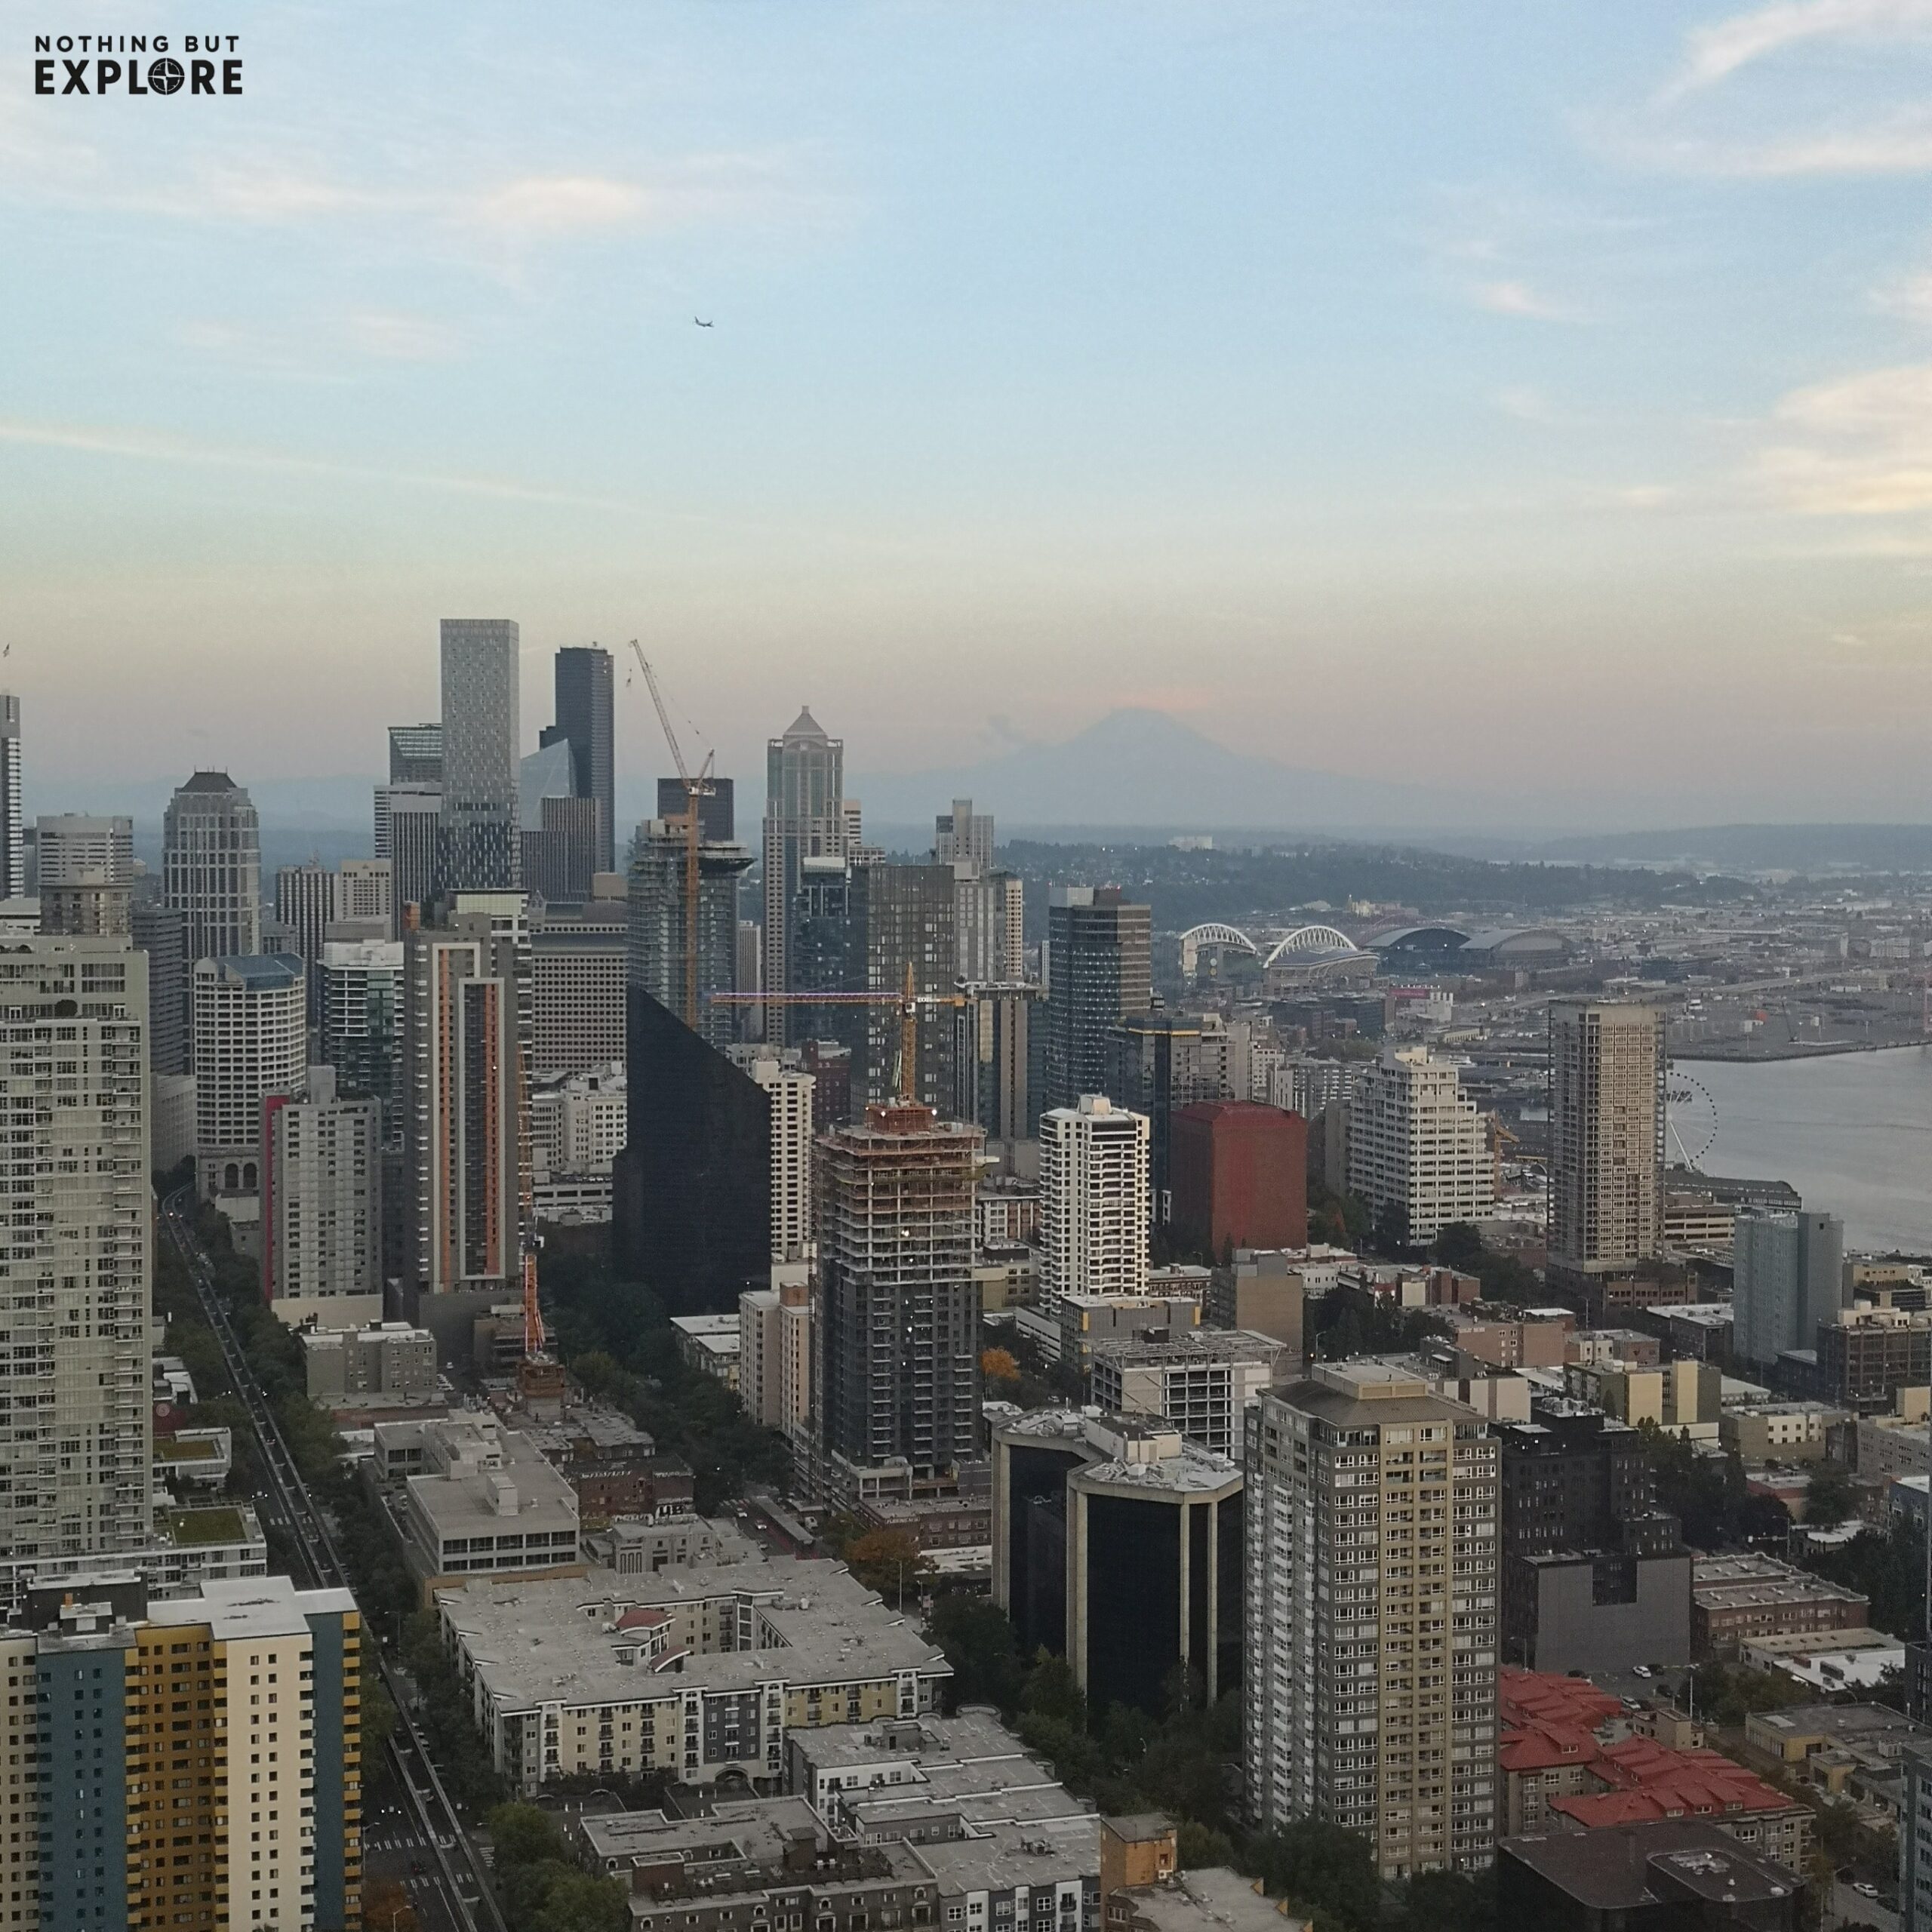
      Well… You know that there is a must to do in Seattle. The Space Needle! There are many adjectives to describe this landmark, but I believe one of them is above all the others:  futuristic.

      I felt on another planet standing in front of the Space Needle

      I’d recommend taking the monorail from downtown to reach the tower. The last and only stop is the Space Needle. This building has been dominating Seattle for more than 60 years now – and it still feels contemporary.

      First of all, you should plan your visit, especially with tickets running out quickly on weekends and holidays. There are time slots for which you can purchase your ticket, but be aware: if you don’t make it on time, you won’t be allowed to enter the building! You should know that the prices range between 35 USD and 42.5 USD for basically one reason – most people are looking forward to staying at the Loupe for sunset.

      That’s right – the Loupe is a lounge located on the rotating deck of the Space Needle. I have to say that although I spent another 15-20 USD for a cocktail, the experience was definitely worth the money. If you’re not interested in one or more activities I have presented so far, I’d strongly suggest you invest a part of your budget into a full adventure at the tower. This is a once-in-a-lifetime opportunity, and you don’t want to miss it!

      Imagine it: you’re sitting more than 180 m (600 ft) above the sea level, looking at the city’s skyline with the sunset, sipping a great cocktail on a revolving deck. What else?

      Seattle offers viewpoints from other buildings, though. And if you’d like to learn about life before modernity in the city, the Smith Tower is a great choice. Tickets cost 26 USD, including self-guided tours to follow its – and Seattle’s – history floor by floor, and access to the observation deck. Here you can eat and drink (watch out for daily offers!), but it’s not as worth it as the Space Needle in my opinion. Although there is also a guided-tour option for 13 USD more, I do think the self-experience is immersive on its own.

      One of the many spectacular views from the Space Needle.

      The cost of other activities in Seattle

      As you understand, the city is full of history (it’s “newer” compared to Europe, but who cares?). There is a fascinating tour you should take and move to the top of your to-do list. I’m talking about the forgotten Seattle underground. The Great Fire happened at the end of the 19th century forced the local authorities to raise the streets’ level around the Pioneer Square area, leaving many shops and houses abandoned below the new layer.

      Beneath The Streets will take you through a section of the forgotten old city with a 1-hour guided tour. Local insights, history, and the feeling that those streets are still alive will be by your side for 26 USD. Special tours – for instance, the one regarding the “red light” district – are available for two more dollars.

      The cost of Internet in Seattle

      If you’re visiting from North America, don’t worry – your SIM card should have a US plan! Check with your operator though, before you realize you’re losing a lot of money.

      For people travelling from other countries, Airalo has excellent service. You should grab an eSIM – if you don’t know, they’re virtual SIMs your smartphone should support – before leaving for Seattle. Once landed, you’ll switch the data over to the new SIM and you’ll be ready for your trip!

      The price is around 5 USD for 1 GB and 7 days of internet.

      And if you’d like to relax and just use the Wi-Fi at your stay, I believe it’s a good choice. At the same time, remember that you might have to move around, which means map applications are probably needed.

      Time to recap your expenses

      Well, you went a long way and you know what you’re going to do for your trip now. Are you a low or mid-budget traveller? Let’s find out (prices are per day per person):

      BudgetLowMid-range
      Accomodation50-55 USD in hostel dorm120-160 USD in private guest room
      Transportation3 USD from airport plus 6 USD when going to Capitol Hill and 4 USD for monorail.
      Rest is walking.
      3 USD from airport AND
      – Option 1
      5 USD of ORCA card with 8 USD day pass.
      – Option 2
      4 USD of Bike sharing plus 4 USD when using monorail
      Food50 USD80 USD
      Activities30 USD for: Space NeedleMoPOPNeumos live musicKerry Park and Capitol Hill street art (both free)60 USD for: Space NeedleMoPOPDimitriou’s Jazz AlleyBeneath the StreetsCapitol Hill (free)
      Total150 USD300 USD

      You’ll notice that accommodation and activities make a huge difference. In addition, you’re not going to spend the same amount every day. At the same time, I think this is a great recap if you’re planning to stay in Seattle for 3 or 4 days.

      What do you think? Up to you now, but let me know if you go there – I hope you’ll find even better deals!

    • 16 exciting ways to spend time in Seattle

      16 exciting ways to spend time in Seattle

      Seattle is well-known as the home for many industry superpowers that populate its hectic business-oriented downtown. However, this beautiful city has a lot more to offer – and you’ll love it.

      Several pubs bring you to Europe with a friendly atmosphere, while you can relax and dream by walking on the Seattle waterfront. The music scene in town is colorful and attracts artists from all over the world. Not enough, you find a perfect mix of museums and modern exhibitions.

      And then, neighborhoods like Capitol Hill witness fascinating stories through art and cafes. You’ll ride the monorail, a piece of history that leads you to the majestic Space Needle – from where you’ll view Seattle in a nutshell.

      The Space Needle looks so futuristic despite being more than 60 years old!
      The Space Needle looks so futuristic despite being more than 60 years old!

      Honestly, my expectations weren’t that high before the trip. However, Seattle showed me that wherever we travel, there are human footprints – either ancient or recent – which make you love this world even more.

      If you’re interested in planning the budget for your trip instead, feel free to check out my cost overview and tips!

      Whether you’re not sure yet or you wonder what you could do there, read ahead and check the best to experience in Seattle. You won’t regret it!

      Disclaimer: activities are not in order of importance – they are all equally immersive in my opinion!

      Grab a coffee at the Original Starbucks

      One of the biggest attractions is the Original Starbucks, located in the cobblestone streets near the public market (more on this later). Its history started in 1971 when people began to taste foreign coffee beans and tea. The current address is actually not the original one because the first store operated for five years at 2000 Western Avenue.

      Although the shop doesn’t sell tea and other spices for retail anymore, you can still purchase whole-bean coffee nowadays. On the other hand, the exterior has been trying to keep its original appearance – you’ll notice the old-fashioned sign!

      The line goes loong on the left - but this is a must in Seattle
      The line goes loong on the left – but this is a must in Seattle

      Once in, you’ll have the opportunity to grab a souvenir and witness some history. This shop is one of the three locations belonging to “The Heritage Market”, which Starbucks uses to remember the icons of its success. Whether you go in the morning or the afternoon, the Original Starbucks hosts huge crowds during the day. Be ready to stay in line for a while!

      Catch some vibes at Pike Place Market

      Pike Place Market is another must-visit piece of history. It has been operating since 1907, making it one of the long-lived farmers markets in the entire US. Craftsmen, merchants, and small farmers: you can buy from anyone and anywhere here.

      The market splits into different levels. On the main floor – located on the street – you’ll find fresh food, flowers, and amazing artisans. I’d recommend being in front of the fishermen’s area at lunchtime because you’ll listen to the classic “merchants’ screams” that used to attract customers! Don’t forget to explore the lower levels, too. You’ll find antique memorabilia, comic shops, and family-owned restaurants.

      My lunch at Pike Place Market. So energizing!

      The variety of vendors is somewhat astonishing, and you can spend hours sailing through this market. While traveling back in time, remember to grab some food and sit outside in front of the ocean – it’ll be the perfect end for your Pike Place tour!

      Discover Seattle underground

      Looking to know more about the city’s back story with some goosebumps?  You must have a ride through the alleyways of Seattle underground! This will definitely be a thrilling and immersive experience for you.

      The Great Seattle Fire of 1889 required rebuilding the business district almost entirely, bringing it to an upper level. And then, the fear of bubonic plague in 1907 condemned Seattle underground to be forgotten.

      Today, just a portion of the area lying underneath Pioneer Square is safe to access. You have two options to visit this landmark. Firstly, thanks to a local citizen the “Bill Speidel’s Underground Tour” was born in 1965, and is still operating.

      The more recent tour company Beneath The Streets instead explores different sections of Seattle’s underground network. If you’re passionate about local history, they also offer customized guided tours about the turbulent past of this evocative location.

      Tours last one hour and cost around 26 USD plus taxes. Special tours are available for two more dollars. Personally, I’ve subscribed for the standard tour – it was an incredible experience and worth the price!

      Enjoy live music at Dimitriou’s Jazz Alley

      Whether you’re staying in town just for a couple of days or you’re planning a longer vacation, you must taste Seattle’s exceptional music scenery. And the best place to do so – in my opinion – is Dimitriou’s Jazz Alley.

      Opened in 1980, this intimate place has hosted many incredible jazz figures throughout the years. With an amazing weekly schedule, you will remember and live every night at its fullest. In addition to the artists, you’ll find soft lights, great drinks, and a semi-rounded layout. This incredible combination makes the alley a once-in-a-lifetime experience.

      I’d recommend you booking your ticket in advance – especially during the weekends! Although the price depends on the musicians playing at the club, you are probably going to spend around 60 USD per person on average. The seats on the main floor are the most expensive ones. If I were you, though, I’d reserve a table on the balcony – the view from above is wonderful and the acoustic is still fantastic!

      Witness European inheritance at St. James Cathedral

      Inside the Cathedral. I'm used to it, but it was interesting to find one in Seattle!
      Inside the Cathedral. I’m used to it, but it was interesting to find one in Seattle!

      Seattle offers attractions in every neighborhood, and First Hill is no exception. For more than one hundred years, St. James Cathedral has been the point of reference for Catholics in Washington State. Completed in 1907, the church underwent a few restorations while keeping its original aspect and purpose.

      You’ll be astonished by sculptures, paintings, and an impressive collection of stained glass. Once inside, the ornaments and messages on the walls will remind you of Europe and its millenary religious traditions.

      The building is open during the day and free of charge to visit – worth the uphill!

      Roam around the business district

      It’s time to stroll down again, and you’ll find yourself in the core of Seattle: the business district. You should know that the city is vibrant and hectic on workdays, but “just” a tourist attraction otherwise.

      The area is limited by Interstate 5 up North and it extends until Cherry St towards the East. This does not include the cobblestone streets around Pike Place, as they belong to the “old” town side.

      The ups and downs through Seattle skyscrapers are somehow magical
      The ups and downs through Seattle’s skyscrapers are somehow magical

      Here you’ll pass by five-star hotels, the Museum of Illusions together with the Art Museum, and towers offering exciting city landscapes (more on this up next). There are many live plays at night time too – for example at Benaroya Hall. Once again, Seattle surprises you with dynamic culture – just let yourself go and explore!

      Travel back in time at the Smith Tower

      One place I’d recommend to stop by while roaming around downtown is the Smith Tower. It might not be the best viewpoint, but paying a fee is definitely worth it to witness this historical landmark.

      Standing since 1914, the skyscraper now offers guided tours through its story of radio connections, rum-running, and more. Adult tickets start at 26 USD plus tax, which includes the self-guided tour (you have to pay 13 bucks more for the guided one, unfortunately) from the main floor until the 35th and full-day access to the Observatory deck.

      This area hosts a bar and many events throughout the year. The tower sometimes advertises special prices with combos and beverage credit – don’t miss them out!

      Despite being kind of expensive for what you receive, I see the Smith Tower as an opportunity to learn about the men who built it and the life back then (isn’t it interesting?). Anyway, if you are just looking for a great view of the city you should go straight to the Space Needle – I’ll talk about it in a few!

      Union Station is a beautiful piece of history

      Before going to the other side of the city, though, you should check out a few things. Since you’ve just been to the Smith Tower, you can follow 2nd Avenue until you are in front of King Street and Union Stations.

      While King Street Station is still operating as the main train station in Seattle, Union Station has been a piece of forgotten history since around 1971. The building was first built in the early 1910s to serve passengers on the Pacific and Milwaukee Roads. After fifty years of service, the latter was interrupted – followed by the other one ten years later.

      What is interesting about this place is that it was expansively renovated in the ‘90s, without losing its identity. Walking in the interior of Union Station will bring you back in time – can you remotely imagine how many people departed from and arrived in that hall? So exciting!

      Have a bite at Mason’s Famous Lobster Rolls

      It’s time to eat some food, but where? Well, remember how Seattle shows both contemporary and ancient sides? The former will lead you to Mason’s Famous Lobster Rolls, located in front of the Art Museum.

      This dining franchise has just opened in 2014 and rapidly expanded across the States. You will have the opportunity to have a taste of the famous Maine lobster in a “fast-food” way. Interesting, isn’t it?

      At the same time, don’t expect the classic cheap food chain (I mean, you’re eating lobster after all). I had a lobster roll for around 25 USD and believe me, it was totally worth it! And if this doesn’t appeal to you – but you are looking for seafood – remember that you have the entire Pike Place Market at your disposal! Fresh fish and many restaurants, it’s like being in a candy store lol.

      Feel horrified in front of the gum wall

      Yes, that’s exactly what I said. Why in the world Seattle has a gum wall, and why should you stare at it? Give me a chance to explain.

      Located in the Post Alley of the market, this “wall” originated in the 1990s without a real meaning. When the Market Theatre started hosting several improv classes and shows throughout the years, the patrons began to encapsulate pennies in chewed gums and attached them to the bricks. Despite the community service removed the coins, the gums remained and the Pike Place Market allowed this spontaneous phenomenon to live as a tourist attraction in 1999.

      ALL GUMS FYI

      The walls became thick and wide until the city council decided it was time to clean them up in 2015. Not surprisingly, people started to recreate this piece of “art” right after! It’s basically considered a landmark for Seattle now – it’s honestly incredible.

      I’d recommend to double check the wall cleanings, which are now executed once every few years. The last one has been made in November 2024, so it might be a little early for you to visit!

      Hang out at Waterfront for the sunset

      I do believe that after being surrounded by chewed gums, you’d like to breathe some fresh air. The best place to do so is Seattle Waterfront.

      You have many activities waiting for you. Whale watching is pretty common here, and if you’re lucky enough you can also spot some orcas while cruising on the water! You’ll pass by the Seattle wheel and the Aquarium (fun for families!).

      There are many dining places too, but take a look at the advertised prices – it might not be the cheapest area to have a bite. Walking on the pier gives you a stunning view of the city’s skyline and the breathtaking Mount Rainier.

      What I did was spend some time hanging out here leaning towards the sunset: it’s simply majestic.

      Ride the monorail

      Whenever you are planning to visit the Space Needle, there is a best way to reach it. It’s the monorail! The 1962 World Fair was the opportunity for Seattle to build this landmark and the tower.

      The railway extends for a bit more than one mile from downtown to the Space Needle area. You can ride either the Blue or Red train, which have dedicated lanes. The ticket costs 3.50 USD and you can purchase it at one of the stations. Your starting point is going to be Westlake Center in Pine Street.

      This is one of the funniest and most amazing experiences you can have in Seattle – exploring and viewing the city from another perspective, even just for a few minutes, makes you wonder how life was back at the 1962 World Fair.

      Besides, this is a transportation masterpiece that has been running for more than sixty years! You can learn about the history and technical details of the monorail by reading the signs on the barricades before hopping on the train – a great way to kill time!

      Walk in the air on the Space Needle

      This is probably the moment you’ve been waiting for the whole trip, isn’t it? Your journey across Seattle’s World Fair history comes to an end at the Space Needle – the futuristic landmark of the city!

      First of all, I’d recommend planning your visit to the tower in advance. Tickets can run out quickly – especially during weekends. Adult prices range between 35 USD and 42.5 USD depending on the time of the day, in which the morning is the less expensive one. You can buy tickets either online or at the vending machines under the Space Needle.

      One of the most exciting feelings – I felt like a kid

      The building offers two levels of sky view: the Loupe and the upper observation deck. The former is the first and only revolving glass floor, which means that you’re going to have a 360-degree perspective on Seattle’s skyline without even moving! You can walk on the glass (I jumped on it too lol) and spend some time sipping good cocktails.

      Yes, that is why the afternoon is slightly pricier. Many tourists look forward to having a drink at sunset while sitting on a rotating deck, which will also give you a spectacular view of the city lights. Romanticism, history, and modernity: the Space Needle includes everything that Seattle owns.

      For the record, I planned my visit for the sunset – I couldn’t have missed those emotions!

      Believe me: you’ll remember this experience forever.

      Play and interact at the Museum of Pop Culture

      One thing I’d like to suggest is to spend a full day in the area where the Space Needle is located. Not only many attractions are awaiting but also you’re not likely to hang out here during your trip again. Let’s say that you’re aiming for the sunset at the tower – what could you do earlier in the day? The MoPOP is the answer.

      The Museum of Pop Culture was founded in 2000 as a music experience project. Although the main focus of this place is still celebrating musicians and hosting related exhibits, the collaboration with Seattle’s Film Festival brought many costumes and scenes objects usually belonging to science fiction.

      The MoPOP from the outside. You can see Seattle artist soul for sure!
      The MoPOP from the outside. You can see Seattle’s artist soul for sure!

      You’ll find different floors and sections, each one funnier than the others. You’re going to be scared in the horror section (there’s a cabin where you can take a picture while screaming, no kidding). Then, you’ll re-live all the best science fiction movies – from “Back To The Future” to “Star Trek”. Eventually, you’ll have the opportunity to learn many music stories and how to play instruments in one of the most amazing places I’ve ever been to. There are many music rooms with a timer where you can jam, even with other people if you’d like!

      In a nutshell, I must say that I was happily surprised by the amount of information and how it was presented at the museum. It’s so fun and interesting learning about our creative culture, in my opinion.

      I’d highly recommend visiting the MoPOP, and if you have children by your side they’re going to have a blast! Tickets are around 30 USD and not time-limited – check the website for more info!

      Dominate the city’s skyline from Kerry Park

      Are you more towards exploring the city on foot, perhaps not aiming for staying on the Space Needle at sunset? Don’t worry; there is an option for you too!

      Once you reach the tower and you’re done with your tour, you can walk up North around the Queen Anne neighborhood. This is a quiet area, with small shops here and there. If you follow the main avenue, you’ll meet Prospect Street: just a few stairs and you’ll find yourself at Kerry Park.

      Here you have magnificent views of Seattle’s skyline, Mount Rainier, and the ocean. There are some benches, and you can take awesome pictures.

      To be honest, I haven’t been here at sunset – but I do believe it’s a valid alternative to admire the beauty of Seattle from above.

      Don’t forget about Capitol Hill

      There is one last unmissable attraction you should include in your trip: Capitol Hill. Among the many neighborhoods in Seattle, I’d say this is the most colorful and emblematic.

      Located northeast of downtown, you can reach it by taking Line 1 – it will take you just around 20 minutes. Once there, you’ll be surrounded by cafes, street art, and history. Even more, you can walk in the “Millionaire’s Row” (14th Ave, one of the wealthiest neighborhoods in town) and enjoy the green of Volunteer Park. And exactly here you can bring your greetings to Bruce Lee, whose grave is located in the Lake View Cemetery.

      Talking about happier things, the nightlife is vibrant around here. The music scene is extremely multicolored, and it has been closely related to many genres since the 1990s. Just look around and find a place to spend the evening – there are plenty of options, including fringe theatres!

      Speaking of colorful streets, Capitol Hill is where the LGBTQ community found its home starting in the mid-20th century. With Pioneer Square starting to decline, people figured that these streets were the perfect choice to welcome the West Coast’s counterculture.

      One of the many meaningful paintings in Capitol Hill. It reminded me of San Francisco! I loved this neighborhood in Seattle.
      One of the many meaningful paintings in Capitol Hill. It reminded me of San Francisco!

      Capitol Hill’s openness helped activists to rise and introduce street art masterpieces where they can express everything. Racial equality and police reforms are just samples of the fights people have been supporting around here. There is too much to learn, and every corner teaches you something: if I were you, I wouldn’t miss this opportunity!

      Give me some advice!

      Once again, this is what I think is worth exploring (and what I actually visited in three days) in Seattle. However, I’m sure there are many interesting spots I didn’t have the time to check out. This is why – as always – I’d like to encourage you to explore every angle, street, museum, and whatever the city offers. For instance, I’d have loved to roam around the Art Museum, but I didn’t make it, unfortunately.

      Hit me up if you find anything not mentioned in this article – I’d like to hear about your story!

    • The ultimate guide to the Kalalau Trail: Kauai, Hawaii

      The ultimate guide to the Kalalau Trail: Kauai, Hawaii

      Have you ever told yourself “I’ve fallen in love at first sight” about a place you’ve been to? Well, this is what I thought while surrounded by the natural power of the Kalalau Trail.

      I’ve hiked many trails in my life so far, visited spectacular viewpoints, and reached the tops of mountains in both summer and winter, but nothing made me feel as happy to be alive as this stunning environment on the island of Kauai.

      My happiness when we reached the final section of the Kalalau trail. Look at the colors!
      My happiness when we reached the final section of the Kalalau trail. Look at the colors!

      The Kalalau Trail consists of various colors, vertiginous cliffs, and wild jungle areas. This is far from an entry-level hike, but the rewarding sceneries you see make you forget about (almost) all the fatigue.

      It was impossible not to stop every few minutes to stare at those amazing views. You won’t care about the sun, the heat, or the thirst. It’s something that goes beyond everyone’s imagination.

      This guide is meant firstly to provide you with all the information needed to face this impervious trail. In addition, you’ll find planning tips, the best spots to take some rest along the way, and my personal experience and advice. You should be prepared for this adventure and think twice about it, so I’ll cover everything you may have questions about!

      Before you read ahead, I’d like to remind you that the Kalalau Trail was just a part of the trip to Kauai, and you can find the road trip tips for the island in this article!

      Where is the Kalalau Trail?

      The Kalalau Trail is located in the North of Kauai, one of the Hawaiian Islands.

      It stretches for about 11 miles, which means a 22-mile (35 km) round-trip hike. You can meet different conditions here: mud and slippery terrain, river crossings, walking on the edge of cliffs, and tropical heat.

      Sounds fun, doesn’t it?

      How do you get to the Kalalau Trail?

      You’ll probably need a car in most scenarios.

      At the same time, there is a shuttle departing from Hanalei and stopping by Princeville resorts. It costs 35 USD for adults, with a discounted rate for children between 4 and 15 years old of 25 USD.

      Please note that the pass includes the entrance to Ha’ena State Park but not to the camping site at the end of the trail. Moreover, the shuttle is your best option just for short day trips, in my opinion. Here to read more about the service.

      If you’re willing to complete the trail and camp overnight at Kalalau Beach, then you’ll have to drive to the park’s parking lot. On the other hand, you could take the shuttle and try your luck a few days later hitchhiking – you should know it’s pretty common on the island. We drove two people on our way back!

      First of all, The Na’pali Coast Wilderness Park requires a permit you can get only online at this website. The price is 35 USD per person for each night you’re planning to camp there. Once you’ve purchased this permit, you can reserve your parking spot here.

      Be aware that both the camping permits AND the spots at the parking lot are limited, and you should plan your trip far ahead. The US government makes the spots available 90 days before the desired date, so you must be ready to book them ASAP!

      One of the many spectacular views you can get while hiking the Kalalau Trail

      How much does it cost to spend three days on the trail?

      Besides the fees for the passes, you should take into consideration renting camping gear somewhere in Kauai.

      There are a few spots around the island, which have similar prices. We chose Kayak Kauai mainly because it was the closest shop to our motel. Please be aware that equipment pickups and drop-offs can typically be made during store hours only, which are usually 8 AM to 4 PM. Don’t worry, you can arrange after-hours pickups, though! Just be sure to set it at least three days before.

      I’d recommend reserving the gear and picking it up the same morning before heading to the trail. In this way, you’ll save one day of rental!

      What is the final price breakdown for three days (two nights), then? Let’s take a look:

      • Camping permit: 70 USD per person
      • Parking pass: around 35/40 USD per vehicle
      • Camping gear: around 115 USD – includes tent, one sleeping bag, and a water filter.

      This brings you to a total of around 225 USD, just for one person.

      Furthermore, you’ll have to add the car rental and the fuel.

      Generally speaking, trips to Hawaii are expensive. If you’d like to focus on visiting the islands and save your legs some trouble, it’s totally fair!

      However, this challenge will be worth the money and the effort you’ll spend on it, I guarantee it! You cannot see such landscapes every day.

      How long should you stay in the Na’pali Coast?

      I’ve reported the cost for three days because to me, it’s the best compromise between money, your body’s recovery time, and living the experience to the fullest.

      Despite being quite a hiker and runner, I found this trail very demanding. We decided to make it in two days, with just a night at the campsite. If you have ever camped before, you know that you usually don’t sleep that much the first night. The adrenaline you get during the ascents and descents, together with the rewarding end of the Kalalau Trail is surely helpful, but it may not be enough for everybody.

      Although we were positively overwhelmed by what we saw throughout the trail, it’s undeniable that our bodies felt the fatigue – especially on the way back the second day.

      Are there any different itineraries?

      So… is it possible to make it in two days? Sure thing, but be careful: you have to be fit to face the elevation gain and tricky terrains. In addition, you’ll likely have just the sunset to actually enjoy the beach at the campsite.

      This is why I believe three days would let you start the hike in a different mood – since you wouldn’t be in a rush – and also allow you to take more breaks along the way. Once you arrive at the end of the first day, you have a full day to recover, relax, and connect with other travelers! What else?

      Alternatively, you could divide your trekking among the three days equally – especially if you’d like to hike up the waterfalls, too.

      There is a campsite at the fifth-mile marker at Hanakoa Valley which might be useful for you: you could include the waterfalls on your first day and set your tent at the halfway campsite. The second day would consist of reaching Kalalau Beach and enjoying the time there. Finally, you should go all the way back on the very last day.

      And if none of this suits you – or you’d like to take some more rest – you can always stay there longer, up to six days. You’ll have to take money into account, though!

      When is the best time to do the hike?

      Kauai is well known to be one of the rainiest places on Earth, and the trail is no exception.

      This means that the best months are from May to November, where the likelihood of precipitations is lower. Besides, the colors in the fall are truly amazing.

      Your final destination is here. The peaks dominate the entire area

      Looking at the wallet instead, January to March is the cheapest for you – and camping permits are easier to get. However, it pours rain at times throughout the winter, which makes the trail even more challenging and utterly dangerous. You can get sunny days during these months, though. This being said, I’d recommend trying your luck only if you’re a good trekker.

      We went during the shoulder season in April, and we were blessed by the sun and the heat. The day before it rained here and there, so again – it’s a matter of pure luck sometimes. At the same time, you can get fair prices in these months as well. This might be your compromise, with an increased probability of finding good weather.

      Is the trail crowded?

      The first 2 miles are going to be a little busy because locals and not experienced hikers will usually end their hike at Hanakapiai Beach. However, it doesn’t mean that you cannot move. There’s plenty of room for everyone in this section. Besides, it will never be packed as classic tourist attractions like the Tour Eiffel, so you can chill out.

      Once you go past the first checkpoint, you’re going to spend most of the time by yourself, with some random encounters.

      What should you bring to the Kalalau Trail?

      Firstly, consider that you’re carrying a tent, sleeping bags, and other gear that you might have rented. This equipment makes your backpack quite heavy already.

      Since you’re likely borrowing a water filter too (it’s a must!), try to stay light on water bottles. There are a few spots along the way to refill your containers – rivers and streams that contain fresh water. What we did was purchase water bags equipped with straws – you can find them on Amazon. Hydration is essential for this challenging route, and that gear might be very handy!

      The heat will be unbearable at times, so wear a hat! Also, bring proper high sun protection. At the same time, storms may surprise you (check the forecast before going there!). A rain jacket, long pants, and a change of clothes are recommended.

      Last but not least, the food. Depending on the amount of time you’re going to spend on the trail, try to optimize the meals. Remember that your backpack is going to put extra weight on your shoulders with all the things you’ll carry!

      So, a little recap of the basic contents of your backpack:

      • Tent
      • Sleeping bag
      • Water filter
      • Water bag (2 liters capacity to refill)
      • Food for N days
      • Rain jacket
      • Sun protection
      • Clothes change – if needed for rain, but definitely another t-shirt at least!

      You have plenty of information now.

      Before making any decision, though, you should read carefully how my experience has been in the next paragraphs. If you’re still doubtful, I’m sure my adventure will blow the clouds away from your mind!

      My adventure on the Kalalau Trail

      It’s 8 AM, and I am full of adrenaline – but a little sleepy. We’re finally approaching the parking lot, and the ranger asks for our permit and IDs. Yes, the camping pass will be bonded to your name, so remember to bring a piece of identification!

      I do think I’ve never been as excited as I was back then – looking forward to facing the infinite lands of this demanding trail. My friend Diogo was going through the same emotions, and we both couldn’t wait to start.

      At the starting point with Diogo. I was ready for every weather condition lol

      There were just a few cars, and the morning breeze welcomed us. Everything was packed on our shoulders, and the unnecessary items were secured in the car. Please note that the parking lot has free access at night time, so store your belongings somewhere safe and locked!

      Well, it was time to hike!

      Warm up and don’t go too fast at the beginning

      The first 2 miles – around 3 km or so – are mostly enjoyable and with just a few steep uphill. Take advantage of these ups and downs to test your legs and breathing without pushing too much. You have a long way to go!

      Just a bunch of hundreds of meters after walking on a wooden path from the parking lot, you’ll find the actual starting point of the trail. There are public restrooms here – if you’d like to taste a final touch of humanity before heading into the wild (lol).

      The marker at the beginning of the Kalalau Trail!
      The marker at the beginning of the Kalalau Trail!

      Don’t worry if you feel like the area is already crowded. Many locals or day trippers arrive early as well, but they’re just aiming for the first checkpoint on the beach – and less often, the waterfalls trail (more on this later).

      Almost the entire first section is covered by the forest, with minimum visibility towards the Na’pali Coast. At some point, you’ll start going downhill on a slippery path. You’ll notice a helicopter landing spot, and then… There it is! The stunning view of the island’s coastline opens up in front of you.

      You can start to admire the contrast of colors that the Kalalau Trail offers

      I couldn’t believe my eyes. I had never seen something like that: full of colors, wild, and it seemed like one of the postcards you’d buy at a souvenir shop.

      The people around you disappear, and you feel connected with this world.

      The first checkpoint: Hanakapiai Beach

      Heading down from the viewpoint there’s a tricky slippery road awaiting, with some steps annoyingly emulating wide stairs. You’ll probably find the end of the descent a bit full of people: simple, there is a river crossing!

      The Hanakapiai stream crosses the area and marks the first main checkpoint, together with Hanakapiai Beach. I’ve noticed many braves jumping between rocks to make it on the other side. In my opinion, you’d better take your shoes off and enjoy the cool (very cool!) water on your legs. Nothing but energizing!

      This being said, the vegetation might be more overwhelming during the winter – keep your eyes alert.

      There wasn’t that much sandy beach when we were there. Still relaxing though!

      The beach is a good spot to take some rest, have a snack, and prepare yourself for the real challenge. Depending on how you are feeling, you can still change your plans – there is an alternate beautiful trail starting from this checkpoint that ends at Hanakapiai Waterfalls. It would be a pity not to use your overnight pass though, right? This is why I insist on telling you to assess your hiking skills before planning the trip.

      Jurassic Park vibes

      We didn’t stop for a long time at the beach since we didn’t want to lose the pace. There are some restrooms just a few meters into the forest after you restart hiking, if you have urgent needs.

      The trail goes up with some sharp turns, and you start gaining elevation again.

      I was so excited after the first views of the coast that I couldn’t keep my eyes off the area every time I pointed toward it. The vegetation there was impressive, dominating the narrow path. I couldn’t resist gently petting every plant, wondering which benefits or dangers they might have hidden.

      We met some hikers who were coming back from the campsite and we asked them about the trail conditions – they were super available. People are so friendly when it comes to helping each other in these situations, and I’m so grateful that every place I traveled to shows we can trust humankind.

      Have you ever watched Jurassic Park? Well, this is the place that was recorded for some of the movie scenes – from the sky. I felt like Mr. Grant looking for dinosaurs, except there weren’t any (and I’d say luckily!). At the same time, we were finally at the end of another shadowed section, when we eventually stared at a natural painting that made me feel so alive: the mountains from the movie!

      One of the many views of the Jurassic Park mountains. Simply stunning

      Here, the trail leads you to an open-air segment where you can just stop and wonder about the awesome planet we live in.

      Sit.

      Breathe.

      Smile.

      This is the perfect spot to rest a little and enjoy the ride. You’re around mile number four, and you are starting to feel rewarded, don’t you?

      Jungle, mud, and the risky business

      From this moment on, you are going to be challenged by switchbacks into the jungle alternated with narrow roads on the coast.

      One of the major downhill into the green brings you to the campsite at the fifth mile. In my opinion, this is your last turning point. If you feel like you cannot walk for another 5/6 miles, then this is your final stop and you can make yourself comfortable.

      Entering Hanakoa Valley. There you will find the halfway campsite and some shadow

      There is another river crossing slightly ahead, which might be good for refilling your water (remember the filter!). We took advantage of the fresh stream to cool down because the heat was becoming unbearable in the exposed areas.

      Be aware that the trail turns muddy and slippery in the jungle, even in sunny conditions.

      At some point, you’re going to face a very steep descent pebbly hill. This leads to the seventh-mile checkpoint, but more importantly to the crucial and most dangerous section of the whole Kalalau Trail: Crawler’s Ledge.

      This place requires extreme attention. I’ll be honest with you – I was a little scared, despite being quite an expert on deadly views.

      You’ll be walking on the edge of a rocky cliff, with just a narrow path for your moves. If you don’t suffer from dizziness, this won’t be a problem. On the other hand, there is one trickier factor to take into account. You’re carrying a lot of weight on your shoulders, and the backpack – plus the equipment – may cause you to lose your balance. I’d recommend studying the trail right in front of you before diving into it.

      Crawler’s Ledge. Credits to KalalauTrail.com

      Personally, I held some rocks with my hands while crossing Crawler’s Ledge to help myself out. You can be the most experienced hiker in the world, but safety always comes first!

      This being said, I was crazy enough to stare at the void and the ocean underneath to fully comprehend what I was going through. I took a second to realize.

      I was in the middle of the Pacific Ocean, hiking one of the most challenging and amazing trails in the world, surrounded by the love of Mother Nature… and one step away from sure death.  So freaking exciting! (Please don’t think I’m insane).

      The last four miles and the colors of the Na’pali Coast

      You’ve overcome the worst challenge of the trail! How are you feeling? Well, we were full of adrenaline.

      Not far away from the scary cliff, we had a pleasing encounter: some wild goats! Quietly having lunch, we thought it was time for us to eat as well. We were around mile number eight, and we found a good spot close to a tiny stream covered by plants.

      The goats were on a very steep hill below us – they make it look easy

      This section is still out and back between green and the coastline, but the switchbacks become shorter. There are still a few steep hills, though. You should know that besides its length, the Kalalau Trail is quite demanding because of the endless ups and downs.

      The sun was high over us, and the fatigue started to be a tougher opponent. And then, there it was: the sign that marked the beginning of the final segment of this wonderful hike!

      What a feeling touching that sign! It’s written in the local language too

      Just a few steps further and you feel even more grateful and rewarded. Open your eyes wide because the view is unbelievable! On your left, you have the green and powerful mountains. At your right, you see the red ground and the blue ocean. Now look straight ahead to locate what you looked forward to the entire time: Kalalau Beach and the campsite!

      I’ve never seen such a pretty contrast between colors. Here, the high and full-of-life peaks fight with the barren hills that disappear into the ocean. The landscape I was staring at it’s something that cannot be described by simple words. You have to be there!

      I had no words in front of this view

      After taking a break to think about the beauty of this place one more time, the last mile or so is waiting for you. Mostly downhill and plain, it includes a river crossing where you can take one last bath before reaching the beach. I’ve never been so happy to dive into cold water, it was so refreshing!

      The campsite, the beach, the end

      The campsite is located next to the beach, under some very friendly trees. There is a spot for everyone, so set up your tent. Here you can chat with many people who chose your same destiny. We had a good time with a couple from the US – they were in their fifties! It’s never too late, right?

      The beauty of Kauai. The campsite is located under the trees

      Depending on your pace, the sunset may be approaching when you reach the end. There is a sort of cave on the beach that you can check out. Moreover, there is a small waterfall where you can refill your water.

      What we did was enjoy the moment and sit to see the sunset, until it was dark enough to say that our adventure was over (well, we had to go back the day after… but I’d repeat myself).

      Sunset at Kalalau Beach. Magical place where to relax after your adventure

      That’s all, folks!

      Steep hills, creepy cliffs, wonderful nature, and brave people: all make the Kalalau Trail worth the ride.

      Now, if you are ready to dive into this challenging paradise, I hope this article has been useful and I wish you good luck! Please share in the comments if you’ve ever hiked a trail like this one, I’d like to find out about other places! Don’t forget to let me know if you embark on this adventure, too. I’d love to hear your personal experience!

    • How to make the most out of a day in Kauai, Hawaii

      How to make the most out of a day in Kauai, Hawaii

      Magical, out of this world, and a unique place on Earth: these are standard definitions of the Hawaiian archipelago. After visiting Kauai, I can tell you that we are not even close to expressing the magnificence of these islands.

      Our trip to Kauai actually lasted almost four days. However, we spent most of the time on the Kalalau Trail, which was our primary goal for this adventure. If you’re a hiker, check how the experience has been in this article.

      This being said, I was already excited when I booked the trip, not realizing that just a few people have the opportunity to visit this remote gem. Looking forward to Kauai’s nature-oriented landscapes, we (me and my friend Diogo) left with high expectations. Spending a one-day road trip around the island was enough to say that we weren’t ready to be overwhelmed by the beauty and freedom of this incredibly green land.

      Every spot is worth stopping (and full of chickens, more on that later), making you forget about all the trouble you’ve been through to get there – whether you fly from the other side of the planet or not. The weather in Kauai is a little crazy, but the frequent raindrops are short and perfect for taking a break from the tropical climate.

      The main road of Kauai: the Kuhio Hwy. You're going to spend most of the time on it!
      The main road of Kauai: the Kuhio Hwy. You’re going to spend most of the time on it!

      What you definitely need is a car, in my opinion. There are a few buses that run once in a while, but renting a vehicle means having your timetable and therefore having the opportunity to see different things during your stay. Isn’t it your main goal when visiting an amazing place?

      I can’t wait to travel back there – I’d like to spend more days driving around because we missed so many unbelievable spots. Prepare the rain jacket, and hop on to explore the best of Kauai in one day!

      Night arrivals are tricky

      We left from Vancouver in the evening – just so you know, there are direct flights departing from there – and after six hours in the sky (Hawaii is further than everyone imagines!) we landed in the main airport of Kauai, close to the town of Lihue.

      If you are staying in this cute village and willing to walk from the airport once you arrive, be rain jacket-ready when you drop off the plane! There is a main road connecting the terminals and the town core, which gives you around 30 minutes to approach the unpredictable climate and relaxing silence of this place at night.

      The road connecting the airport and Lihue. You can already see the beautiful peaks

      At the same time, when landing on a late flight, the local restaurants will disappoint (or surprise?) you. Don’t worry; this is not because the food is awful! Unfortunately, the majority of the dining places close very early in the day in most of the island. Your options are either order in or there are well-known supermarkets to save your stomach!

      Choose Lihue for a strategic stay

      We decided to stay in Lihue for mainly two reasons. Firstly, there are no resorts here, which means cheaper accommodation. Kauai Palms Hotel is a bit vintage, but if you’re looking for something affordable (remember you’re traveling to Hawaii, though) it’s definitely for you!

      The Wi-Fi works great, and there is plenty of parking. Also, the personnel are available for your needs most of the day. However, a room for two people may be too small sometimes. Speaking frankly, I do believe this is a good compromise if you are looking forward to saving money and you don’t mind being a little adventurous!

      This is the motel’s “backyard”. Not bad, right?

      You should know that Lihue is located right between the North and the South of the island. Here is the second reason why we stayed there, because if you have just one day to road trip your plan can be efficient and the exploration time optimized! You can choose one side of Kauai, have a pit stop at the town on the way back, and drive to the other side. This is more or less what we’ve done (more on that in the next paragraphs).

      Early mornings in Kauai are amazing. Whether it’s raining or the sun is shining, you feel so at peace and ready to dive into the green forests that surround you. Still hungry from the night before, we looked around to find a place for a bite.

      Kauai Diner is super close to the motel and opens very early (5:30 AM!). Here you can have a delicious savory breakfast with a taste of authentic Hawaiian. Served by a gentle but gruff woman, we felt this was the perfect spot to fully charge our batteries and be prepared to explore!

      Kauai Diner has been our morning stop quite frequently

      Wailua and wild chickens

      Heading North for your morning trip is, in my opinion, the wisest choice. There are many awesome spots along the way, and since you’re full of energy, you’d better visit this part of the island first! After stopping by a market to grab some food – always looking at the wallet – we pointed to Wailua.

      Besides stunning waves and resorts on the beach, Kauai offers even more when you drive towards the inland. Your first stop should be Wailua River and its lookout (you can find it as Poliahu Heiau on Google Maps). Here, you are astonished by the nature surrounding the water. If it’s raining, the contrast between the grey clouds and the green forests makes you feel so tiny compared to the wonderful landscape spreading in front of you. And if your trip is longer, you can rent a kayak and paddle on the river!

      Wailua river lookout. It rained quite a bit that morning, but it cleared up along the way!

      But you’re not alone there… May the chickens be with you! One thing you’ll quickly notice is that wild hens are

      Literally.

      Everywhere.

      The local lore tells that the hurricanes that happened in 1982 and 1992 destroyed domestic coops. Hence, the chickens were released into the jungles and they mated with the wild red junglefowl – which was brought by the Polynesian. The result is feral chickens invading the island – they’ll definitely wake you up at 5 AM!

      Wailua has another couple of beautiful spots worth the ride. Just a few hundred meters after the river’s viewpoint, head to Opaeka’a Falls lookout. These waterfalls are the most accessible on the island, and there is even a tour including the beautiful Fern Grotto if you have room for some extra-budget exploration.

      Keep roaming inland and you’ll end up experiencing a taste of Indian culture in Hawaii. Yes, that’s right! Kauai’s Hindu Monastery rises at the beginning of the Rudraksha Forest with its traditions and peaceful environment. Meditation rooms are available to relax and live something special, and the rain makes it even more magical. We were lucky enough to assist to a holy celebration, but be aware: you must keep your mouth shut while watching it! This place is worth the visit, and keep in mind that it’s open in the mornings only.

      The entrance of the temple. The atmosphere there is just inspiring

      Where to stop along the road

      With sun and rain fighting over each other every 15 minutes – no kidding! – we continued heading up North and reached the biggest city on the island: Kapaa. Here you can find markets, souvenir shops, and a few accommodations – including cheap hostels.

      There were many spots for camping gear rental as well, which was what we needed for the following days. Anyway, we decided to keep driving and leave the town vibes for later. Before leaving Kapaa, though, you should stop at Kaiakea Point. From here, you can admire the infinite ocean and Kauai’s coastline towards the South.

      The Kuhio Highway is where you’re going to wander most of the time. We were astonished by this scenic route, where nature reigns and your eyes are constantly wide open. After enjoying quite a long drive, your next must-see spot is Kilauea Lighthouse, located in the homonym village.

      Kilauea Lighthouse area in all its beauty - North Kauai
      Kilauea Lighthouse area in all its beauty

      You can visit this solitaire watchtower twice per week with guided tours, which will help you out figuring the history behind this landmark. However, you must book in advance (here if you’re interested). Unfortunately, we didn’t know that, so we just stared at the vertiginous cliffs and smiled at the overwhelming amount of birds flying around. This is why the lighthouse area is perfect for bird watching, too!

      Be aware that there is no phone reception in this remote area.

      Don’t forget to wave around this little town if you have some extra time! Chill vibes will surround you, and you’ll get to know local history.

      Time for some good food and beaches

      All this exploration requires a pit stop to satisfy your tongue, right? Well, the food trucks in Hanalei will probably attract your inner foodie. This village is a great destination for five-star hotels and resorts facing the ocean. At the same time, you’d rather stay up next to the highway to taste some delicious local plates!

      Grab some lunch at Fresh Bite Farm To Beach, and you won’t be disappointed. Among the huge variety of choices, the bowls with fresh (it’s in the name, no?) ingredients are a must. We had veggie meals containing avocado, mango, and other locally grown plants. Unbelievably tasty and natural, this is an incredible opportunity to finally have a fantastic Hawaiian meal!

      If you look around and walk a few steps, you’ll find yourself absorbed by traditional delicacies and cute (but pricey) shops. Feel free to take some rest in the area, but there is one spot left further up North you should visit.

      What we did was go back to the car and leave Hanalei’s peculiar vibe for later on our way back. Your choice, of course!

      You’re in Hawaii, a well-known beach paradise. It’s time to stop by one of the beaches in North Kauai, and your eyes might catch Lumaha’i Beach. This wild strip of gold sand is the perfect spot to enjoy Kauai’s spectacular nature and chill out a little.

      Lumaha’i River crosses this place, allowing you to have a dive in a mix of salty and stream water. You know, the ocean is kind of dangerous, especially due to the crazy weather conditions on the island. Black rocks are waiting for you to be climbed – you can spot vivid sea life here, including crabs and birds. Also, you can look deep into your soul and be inspired by the landscape in front of you.

      Lumaha'i Beach. Smiling because of the rain it's a new skill I've unlocked in Kauai
      Lumaha’i Beach. Smiling because of the rain it’s a new skill I’ve unlocked in Kauai

      Back to Hanalei for shaved ice

      At this time, you are probably wondering if you will make it to the South before the end of the day. I know, every spot is worth stopping and time is so tight!

      Either way, you should stop at Hanalei again on your way back (if you didn’t before). The temperatures are high in the afternoon, so what about something refreshing? Wishing Well Shave Ice offers different choices for one of the most “I’d like to cool down” snacks I’ve ever had. Shaved ice is a big thing in Kauai, and it comes in rainbow colors to satisfy not only your thirst, but also your eyes!

      After a quick walk around the cozy shops of the upper town, you realize the clock is ticking. Let’s head back to the car for a long drive towards South Kauai, then!

      Kapaa and a quick look at Southern Kauai

      While enjoying the road trip on the Kuhio Highway, Kapaa is waiting for a little exploration. There is a market where you can grab some food to save on dinner and snacks. Feel free to check out all the souvenir shops, and the handmade creations of local people. Although undoubtedly fantastic, they are very expensive and not suitable for your financial plan – at least they weren’t for us.

      If you’re running out of time – like we did – your final destination must be Waimea and its amazing canyon. Located in the very far South, the main attraction of this village is the inland’s rocky formation.

      There is a steep and scenic road – don’t worry, car-suitable – starting from the town and leading to the canyon. The perfect time to arrive here is at sunset. Your best plan should be to drive up to the canyon viewpoint, take some awesome pictures, and admire the vastness of this place first.

      Its mix of colors, combined with the river digging and waving between the rocks, makes this natural beauty one of the best spots in Kauai, in my opinion.

      Waimea Canyon. Stunning views from there!

      The sun is about to set, and you’re in the right place to end this incredible one-day journey. There are many lookouts on the way down, and you can simply stop at one of them to think about what you’ve just lived.

      What an emotional dream this road trip has been!

      Is this the most interesting itinerary?

      Few would argue that the above described itinerary is the most naturalistic. The point is… I don’t think there is another way to define Kauai with a single word, honestly. Its beauty resides first and foremost in the green forests, wild beaches, waterfalls, and anything that Mother Nature built there.

      On a side note, we do regret losing the opportunity to learn more about local history. In addition to the Kilauea Lighthouse guided tour, there is an interesting museum located in Lihue.

      Kauai Museum shows plenty of information regarding the history of Kauai. From its discovery and the colonial period to native artifacts, this collection brings you back in time. The price is 15 USD – perhaps a bit expensive, but definitely worth the visit.

      Keep in mind that the museum is open until 4 PM.

      How do you find the time for this, though? Well, what I’d recommend would be giving up on either the local shops in Kapaa or optimizing the time in Hanalei (remember the double stop we made for lunch and then the shaved ice? You could make it all together!).

      Talking about beaches instead, there is a wonderful spot up North – the very last strip of sand before the wilderness of the Kalalau Trail.

      Tunnels Beach is known for snorkeling and its beautiful views of the Na Pali Coast. If you’re looking for wildlife underwater encounters, this is the place for you. Saving some time to drive up here might be a challenge, but you could always skip a couple of viewpoints along the way… You can stare at Jurassic Park’s (yes, one of the islands in the movie is Kauai) green mountains from this heavenly beach!

      The incredible landscape from Tunnels Beach. Credits to Yelp

      Final thoughts – is Kauai for you?

      Wrapping up the best of Kauai in just one day wasn’t the easiest job of my life. If you’re an addicted hiker like me, you’d feel that you missed a lot of opportunities to explore the forests and the core of the island.

      On the other hand, you might like to stop by more beaches and relax.

      Again, Kauai is a natural paradise. If you’d like to feel like an adventurer who discovered the island for the first time, you could make the best out of the stunning spots in Kauai. Scenic views, infinite green forests, and numerous hikes should bring you to explore every single corner of this land.

      The way people still treat their native place and their connection with it is incredible. Modernity is pulled aside here, and although some five-star accommodations are present, the main attractions of Kauai are its traditions and pristine environment.

      What if you’re just looking to spend the whole time under the sun drinking some crispy cocktails? Well, this is not the Hawaiian paradise you’d expect. Your best bet would be either Honolulu – the most “contemporary” island – or Maui, with its mix of touristy locations and wild lands.

      Sunset from the road that leads to Waimea Canyon - South Kauai
      Sunset from the road that leads to Waimea Canyon

      Personally, I fell in love with this place.

      I know that it might be easy to say for me because I’m nature addicted. At the same time, I do believe many people will find Kauai to be the perfect match to actually experience something completely unique in this world.

      This island helps you to reconnect with our planet and its people, far away from skyscrapers and businesses. There is something magical about Kauai, between its introspective journey and the power of nature that dominates it.

      Roaming around this piece of land will be enough for you to understand its values and incredible history!

      You’ll never guess it, but I will definitely be back here (lol). I’d like to explore more, learn even further, and live all the emotions that I’ve felt on that exciting day.

      Our journey on the island wasn’t at its end, though. Check out our “beyond the fatigue and more” experience on the Kalalau Trail in this article!

      When to visit Kauai

      The best times to visit Kauai are definitely the shoulder seasons. Not only you can find great rates and the island is less crowded, but also the weather is typically better compared to other months.

      This being said, please remember that you are traveling to a tropical land, which means occasional showers are often expected. For example, we went in April and the weather was a little crazy just the first day – with light rain every now and then, but it was more refreshing than annoying.

      Rain and ocean mixed on the rocks next to Lumaha’i Beach – magical!

      Wintertime (between November and March) is the wettest. In addition, I’d recommend avoiding going in December because the prices spike up.

      How to get around

      Well, you’re in North America. It is well-established that they’re not really inclined to public transport in general… Kauai is not an exception. As previously mentioned, your best choice is renting a car.

      Unfortunately, it seems that the major rental companies have a monopoly on the islands. There are a few options online to get some quotes from “local” renters, but they’re not as cheap as you’d expect (whenever they don’t show the prices clearly, it stinks). At the same time, you can reserve vehicles for good rates by planning your trip ahead. Again, shoulder seasons bring many advantages to this, too.

      Share your experience!

      If you’ve ever been to Kauai, please hit me up here or on my social accounts! I’d love to know what I missed and if you’d like to go there after reading this post. I’d love to help!